
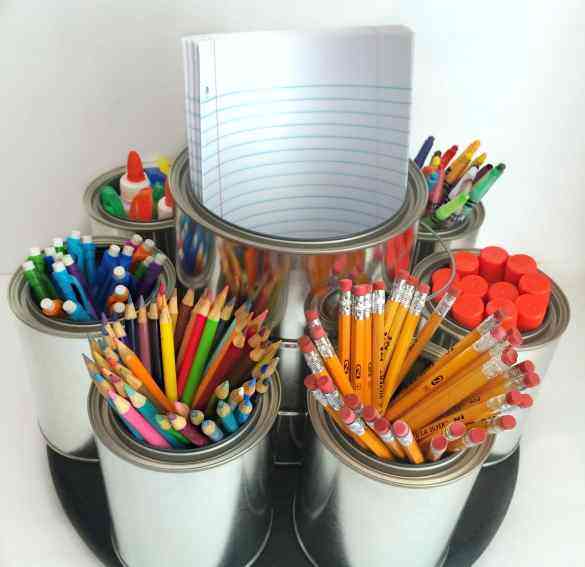
Rotating Pen Stand
Keep all your stationary within reach without taking up much space with this cute DIY project! It is convenient while being pretty.
To create this pen-stand all you need are:
- Two baking pans. One large and the other, comparatively smaller.
- Marbles
- Cans
 Here is the procedure:
Place a huge amount of marbles into one of the trays. Over this place the other baking tray. On top of the smaller, making tray, place cannisters or cans. Make sure you wash the cans properly before putting your stationary inside it. Decorate it with ribbons, metallic sheet or just keep it as it is.
Cute Bookmark
To mark where you are on a certain page, use this cute bookmark made out of felt. You can replace felt with any material though. For this project, you will need:
- Felt sheet of bright shades
- Pencil
- Scale
- Scissors or craft knife
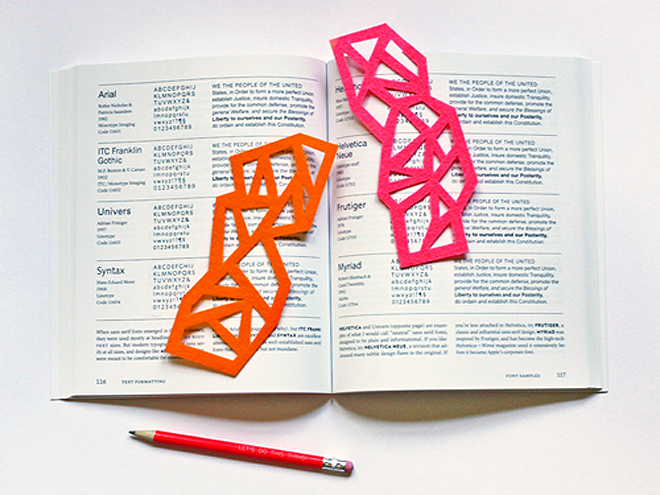
Cut the felt sheet to appropriate size. Using a pencil draw various shapes on the pencil. If you are unable to draw perfect lines, you may employ a scale to help you with it. Use a craft knife or a scissor to cut through the sheet. Do not limit yourself to making a rectangle bookmark. You can create an unsymmetrical bookmark, too!
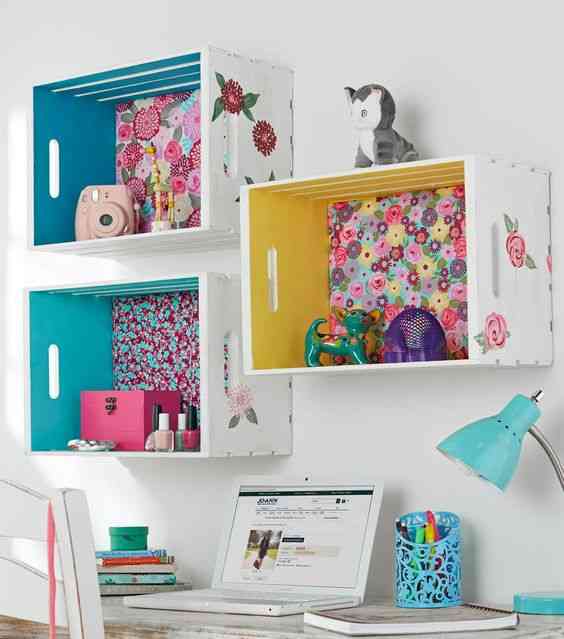
Wooden Crate Shelves
For this DIY you will need:
- Two paint of complimentary colours
- White paint
- Scrapbook paper or wallpaper
- Glue
- Stickers
- Nails
 The procedure is as follows:
Add two or three coats of white paint onto the insides and outside of the crate before applying a coat of your desired colours. To get the desired consistency of colours, you might have to apply more than two or three shades. Use glue stick the scrapbook paper or wallpaper at the base. Fix the crate to the wall with nails. Keep your extra belongings within your reach and in these crate shelves.
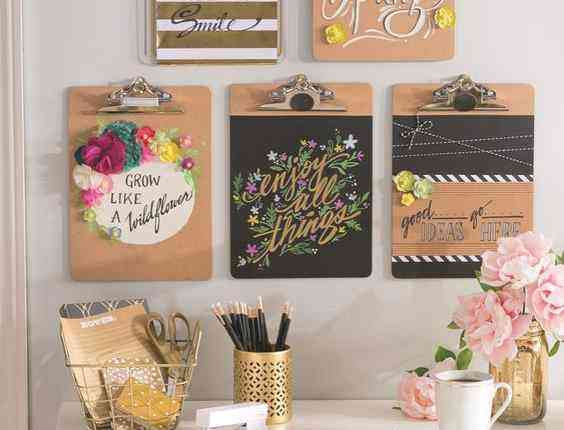
Typography Art
Inspire yourself with this DIY! How to make it?
Here is a list of what you will need
- Printing Paper
- Internet
- Printer
- Exam board or as someone of you might call it, clipboard
- Nails or hooks
- Paint
- Fevicol
 Procedure is stated below:
Take your wooden clipboard and paint it your desired shade or just leave it as it is. You can also paint the clip or leave it as it is. Print out some pretty typography which says something inspiring or at least something that inspires you. If you have any fixing to do, you might do it before you actually stick the printed sheet on top of the board. Using glue, stick the typography onto the exam board. Wait for it to dry, remove all the bubbles and apply another glue on top of the typography. After it has dried up, hang it on the wall.
Pin Board
There must be a lot of things you need to remember. This DIY comes handy during moments when you want to remember the project dates or stuff.
Materials required:
- Cloth
- Hot glue
- Hook
- Cardboard
- Scissor
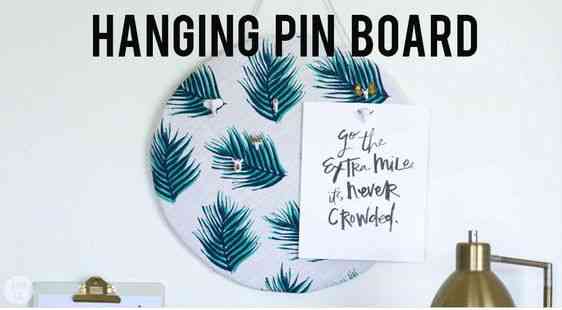
Cut a cardboard into desired shape. Circle, Rectangle, Square. Whatever. You might consider sticking several cardboard together to give it some amount of strength. Take a cloth and stick it to the cardboard using glue. Stick hooks onto the base. Make sure the hooks are not eye-catching or if they are, then they compliment your creation well. You can also consider leaving space for sticky notes.
Rock Cactus
Not everyone has a green thumb. Hence, they often have to keep themselves from using plants as aesthetic. But with this DIY you can add some to your room.
Materials required:
- Rocks
- Various shade of green paint
- White paint
- A terracotta or plastic pot
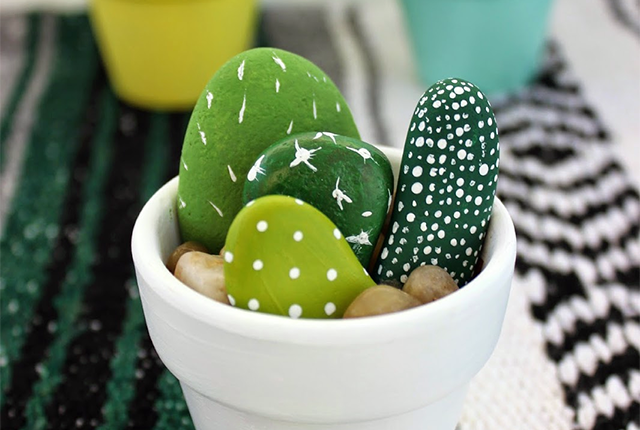
Paint few of the rocks white. Let it dry before applying different shades of green to these rocks. Let dry. Using various instruments, draw dots and spikes on to the body of your cactus. Dump some small rocks into the pot. Before which you might or might not colour your pot. Create a hole and fix your stone cactuses into it. Let it be supported by other, unpainted small rocks.
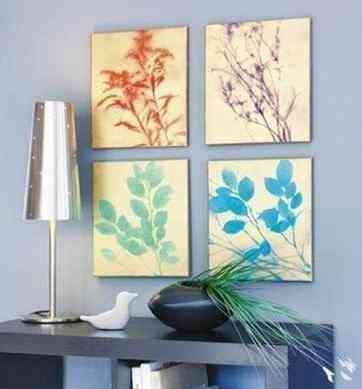
Leaf Motif Painting
Materials needed for this DIY
- A leaf of any kind
- Paint
- Paintbrush
- Spray Paint
- Canvas
 Here is the process!
Apply a layer of paint on the canvas. Convert the whole white canvas into say, blue. Place the leaf on top of the painted canvas. Shake your spray paint can and begin spraying from top to bottom until the whole canvas is coloured with the spray paint. Slowly, and carefully remove the leaf. And behold your new pretty canvas. Make sure you spread a newspaper underneath as well as in and around the area where you are going to spray paint until and unless you want to colour the area around the cans. Spray paint is inflammable so you might as well make sure to keep away from fire while spraying.
Charging Station
With all that wire clutter, any aesthetic you add to your table would end up doing nothing. These wires are like frustrating little pimples, just longer. This charging station will hide it though.
For this you will you need:
- Shoe box
- A craft knife
- Pencil
- Multiple Chord
 The process is as follows:
Draw circles or any shape on the shoe box. The size of the shape must be large enough for the wires and plugs to pass in and out of it. Cut it out using a knife or a pair of scissors. There you have it. Within the box, but a multiple chord switch board into which you will plug the charger into. The tail of which will be inserted into the main socket board.
DIY Scented Candles
Now that we are done with visual aesthetic, how about some aesthetic for our nose?
For this project we will need:
- Glass
- Candle Wick
- Metal Collar
- Plier
- Toothpick
- Wax
- Essential oil or vinegar essence
 Wash the glasses and dry them. After which you might consider preheating them in an oven on a ‘keep warm’ setting. Thread the wick through the metal collar and using a plier, squeeze them shut. Put them inside the glass. Secure them in place by using two toothpicks. Melt the wax along with some non-toxic crayons. Take wax off the stove once it has completely melted. Add essential oil or vinegar essence into the wax. Pour the mix into the glass carefully and slowly. Leave a little space at the top. Pour more as the wax begins to set. Trim the wick.
