

Are you having a musical itch? Wanna set up a Home Recording studio for yourself? It can be challenging to know where to start with all the required equipment. The basics are obvious, though studio production can be overwhelming.
You can learn how to plan a studio, what equipment is essential, and how to set it up to start track cuts as quickly as possible.
Following are the tips to make a Professional Recording Studio:
1. Find a good place
The best recording studios are in well-isolated, windowless quarters. The room should at least be able to hold a small table for your computer and interface depending on the size of the group you wish to record. The performers should also have room.
Avoid rooms with plenty of external noise. Seek the quietest possible place. You don’t want a perfect grip disturbed by the lawnmower of your neighbour.
Generally speaking, larger is better. Try to find a place that is not too tight and has room for several musicians and all your equipment.
Watch out for the floor of the room. Ideal rooms should have floors made of hardwood, cement, or tile that are ideally suited to acoustics. Taping is going to withstand high-frequency sounds, but not low sounds. Heavy foot traffic can also make it worn down.
Choose a room with good acoustics overall. In general, this means a bigger space with relatively high ceilings, asymmetrical walls, and irregular sound dispersion surfaces.
2. Map the basic configuration
There are more than just microphones and musicians in a recording studio. There are two main systems in most studios. You will have to recognize and arrange these in line with your desires and goals.
The first setting is the machine recording. It captures the audio from instruments and microphones remotely (using a monitor or a tape recorder) or by recording.
The second system is known as the monitoring system. This involves an amplifier and a monitor for the recording technician to listen to the recording as finished and to mix and edit after recording.
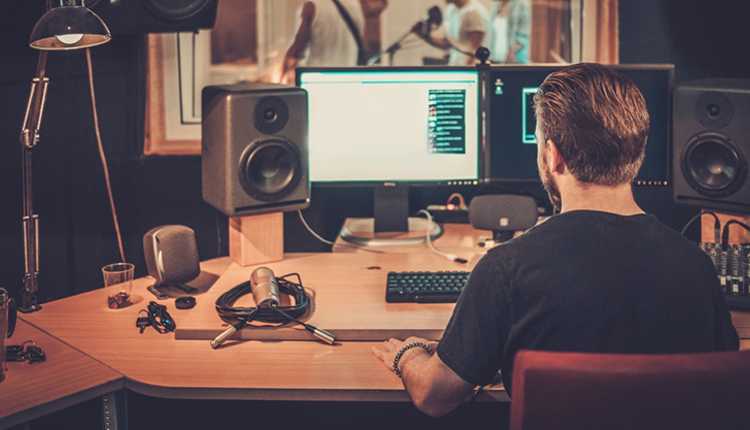
With a very limited budget, you can set up a home recording studio. You would at least have to have a computer, a combination of the DAW / Audio interface, studio monitors, a pair of headphones, a microphone, a few wires, and a microstrip.
A simple setup for approximately $400 is possible. However, you may not want to go much further, or the quality of the Music will be affected.
3. Design a trajectory for a signal.
Audio systems of any type can be demonstrated in the professional world by drawing a signal path. This follows the audio signal from start to finish, which shows the user exactly what the sound is made on a particular system. The signal path is based on a basic plan for a typical beginner’s studio.
The “input source” starts the signal, that is to say, devices and microphones. The unit attaches to a computer and transforms the analogue sound waves into digital data from there to a recording interface.
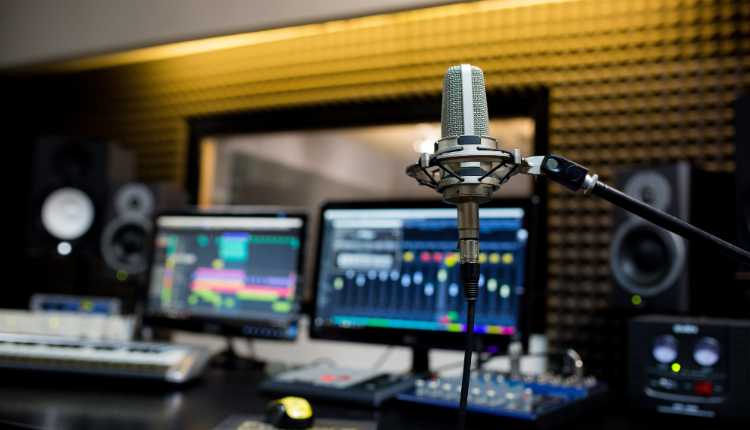
The signal must join the Digital Audio Workstation (DAW) program from the computer interface. Here you can edit or mix the recorded sound.
Next signals go to an audio interface or to an analogue signal that is returned. Finally, the analogue signal is released via the monitoring system.
4. Get plenty of RAM from a computer
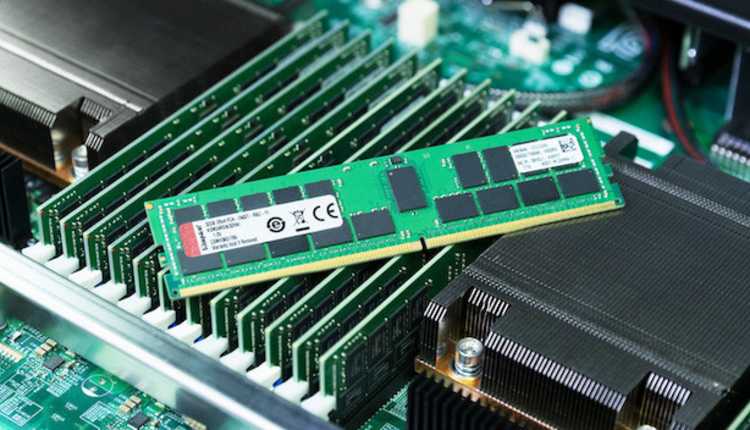
The more your computer is powerful, the easier it will be to produce Music. By electricity, that means much storage and plenty of RAM. The most important thing is to upgrade RAM and storage, as this helps the machine to work more smoothly and more efficiently.
5. Select the software for recording
All modern recording studios use the software of the computer to save audio and edit it carefully. Digital audio workstations vary greatly, but the usual buy-in of a grabbing interface is one.[9] The Garage Band is used by Mac users, while PC users can use a free alternative such as Pro Tools12 version. Digital audio workstations (DAWs) are widely used on a modern Mac.
6. Choose a suitable studio interface
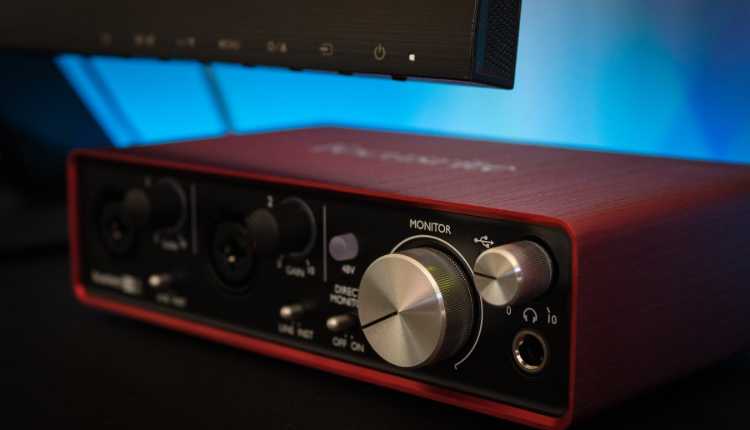
Analog sound on your computer is converted into a digital signal to be processed by your computer, and the digital audition also returns to analogue sound on the displays. They are an important part of any good studio recording.
Some input rates include 1212 M Emu, Julia ESI, and Audio 192 M-Audio. Audio is the most essential in the world—the quality sound of these models at a modest price.
A good interface usually costs approximately $150 for recording. Monitors (like the extremely popular KRK Rokit series) begin for a pair at around $300. Up to a couple of thousand dollars more can cost high-grade interfaces, including Focusrite and AudioFire, Fireface 400 or 800, or Lynx models.
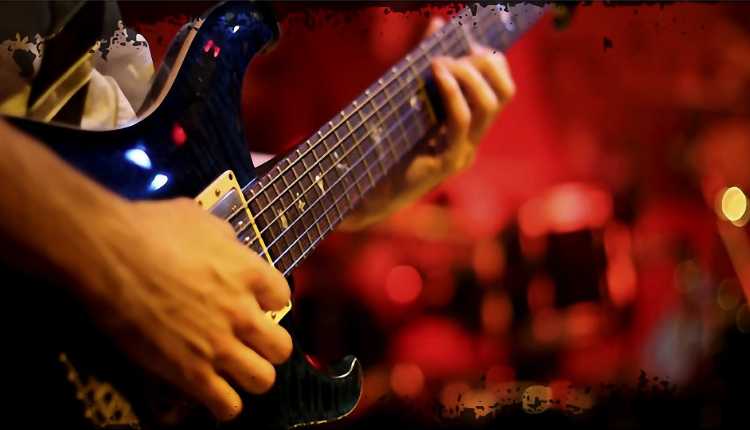
7. Get some microphones of high quality
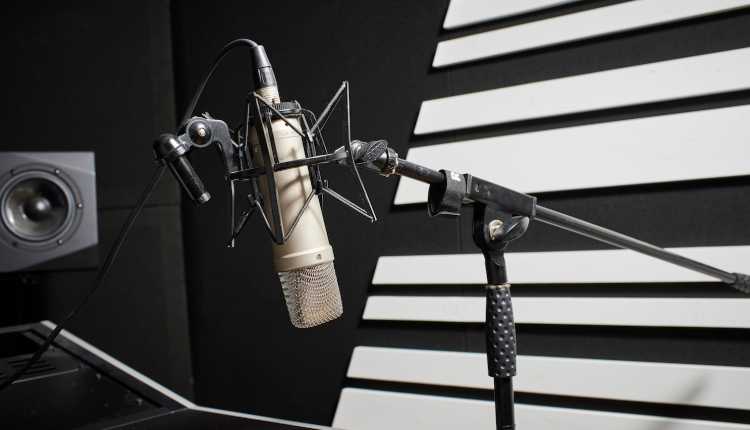
Most recordings Studio usually have a few microphones for performers using a combo of dynamic and condenser. For louder sounds, dynamic mics are better and longer-lasting. The guitar amps, drums, and other loud sources are used. Condensers are sensitivity, cost, but also details, brightness, and clarity are higher than similar dynamics.
A decent microphone for a good dynamic or condenser costs $80-$200. Make sure you have Phantom power on your recording system with a condenser mic. Usually, this is a “+48” button and drives the electronics in the microphone. In the absence of this function, most microphone preamplifiers can deliver power and are affordable more than purchasing a new interface for Music Song.
Dynamic mics do not need electricity, meaning that they can be conveniently connected to and used without a preamplifier. However, they sound better in some cases with a preamp. There are mics with USB outputs as well. Although they can be directly plugged into a computer, their quality is usually lower. Electric instruments can also be connected directly via a USB to the device through a DI unit or a direct box.
8. When buying supplies, be frugal
Music Production is an art, not a science, just like Music itself. The price tag on your equipment does not always increase your efficiency. In today’s house amateur studios, low-end equipment would have been impossible for leading studio engineers just a few decades ago.
Radio bangers can be captured in a home studio. Costly equipment is great and can lead to great records, but you can’t stop making great music. Benefit from free software. Native Instruments, Ohmforce and Camel Audio, provide free virtual instruments and accessories and other trusted audio companies.
Take the old analogue equipment to remember. Many studios are now digital, but the good ones can still work on your equipment with analogue equipment. When putting the studio in your diagram, consider adding a plate reverb device or a bobbin-to-bob computer. On one of these, you can record and rebound in the audio when you’ve finished. These sounds can not be digitally reproduced.
9. Have a few musical tools on hand
Most studios assume that musicians want to make a precise recording of their equipment. This makes it harder for the engineer to work because she has to spend a lot of time building unknown instruments. However, other studios may have equipment in place to produce a specific tone, which the engineer understands and can use.
10. Live room isomerizing
Two stuff does soundproofing. By blocking out the noise outside, it makes the room quieter. It also improves the sound quality by absorbing excess noise in the recording.
Soundproofing can be costly in a professional way. If you have money to spend, but you can spend a large studio significantly on acoustic foam or panel. The selection of studio space is an economical way to reduce sound. Seek a living room with no windows and heavy, thick, or isolated walls.
If you have a budget, get some blankets and hide doors and windows to reduce background noise. The addition of mass to the walls, like foam, also contributes to the absorption of sound in the room.
11. Put the booth in the voice
Most studios have a special room for vocals. It can be difficult to record vocals. They must be recorded up, which allows the singer to keep a good sound more easily. The microphone should be comfortable too.
The vocal stand is an isolation stand; it should, therefore, be isolated acoustically. The mic should be fitted with a pop filter to avoid saliva and filter out harsh sounds, such as t and s. You can buy one for $10 or $20 if you don’t have a pop filter.
When your mic is directional, and only one side gets Music, turn it to the vocalist on the side of the microphone. When he sings, his mouth must be about 10-15 cm from the microphone. This distance should not be too much altered, as it sounds like
12. In the live room, build the instrumentalists
You want to hold mic from the sound source so that they are not hindering the performers, i.e. acoustic instruments or amplifiers. Normally, this does not require any kind of pop filter. Use the instrument if you have a small mic. The user manual usually contains instructions.
Using mics or microphones over the drums. Drums may vary by sound style, and by the style of gear from which the musicians come. Single mics clip individual components to create the best drum sound. They can then be placed on the same DAW channel.
Take a single stick and place it a few feet above the centre of the device, if you don’t feel like fitting each part with a distinct stick. There is no pop filter, but please ensure that your mic is face down.
13. Pick Your Recording Software
Of course, when you’re in the studio, you don’t play with a live audience – you ‘re recording. You will, therefore, need the support of the software recording. There have been several software alternatives, but Cakewalk Sonar and Ableton Live are two of the most popular.
It is worth noting that most software has different pricing feature levels, such as “free” versions versus “premium” websites. Sonar “Artist” for example costs ten dollars/month, Sonar “Professional” costs 20 dollars/month, and Sonar ‘Platinum’ costs 50 dollars/month.
The more you are ready to pay, the more features and flexibility you will receive – but, at this stage in your career, you may not require all the fancy (and expensive) whistles. Do your research and choose the best software for you.
14. Audio Interface Install
We need a little backtracking to explain why an audio interface is important. First of all, you must know what a mixer is, namely, a device that can mix audio signals such as levels and timbres. You can attach instruments and microphones via an audio interface to your device through a mixer. Your sound card is replaced by the audio interface.
