

In a perfect world, all of the systems and tools you use to create and maintain your WordPress sites would be both convenient and secure. Unfortunately, that isn’t always the case.
XML-RPC is useful for enabling remote connections between various external applications and WordPress. On the other hand, disabling this feature can help improve your site’s security. Plus, unless you belong to a specific category of WordPress users, there’s a good chance you won’t even miss it.
In this post, we’ll explain what xmlrpc.php is, how it’s used, and why you might want to disable it. Then we’ll show you how to turn it off both via a plugin and manually. Let’s get started!
What Is xmlrpc.php?
XML-RPC is a feature included in WordPress, which enables data to be transmitted. It uses HTTP as the transport mechanism and XML as the encoding mechanism. Simply put, xmlrpc.php lets you access your website from custom admin software and mobile applications, rather than through a browser.
How Is xmlrpc.php Used?
Unless you use remote technologies and mobile applications to update your WordPress site, you might not be familiar with XML-RPC. For the uninitiated, you can use xmlrpc.php to establish a remote connection to WordPress, and make updates to your site without directly logging in to your WordPress system.
Over a decade ago, before WordPress 3.0, there was an option to turn XML-RPC on or off right in the dashboard. However, when WordPress released its own iPhone app, this option was removed.
Now, when you download WordPress, XML-RPC is automatically enabled. However, you may still want to disable it yourself.
Why You Should Disable xmlrpc.php?
The problem is that xmlrpc.php poses a security risk. It creates an additional access point to your site, which could leave it vulnerable to external attacks. Every time you authenticate XML-RPC, you need to supply your username and password. As you can imagine, this isn’t exactly ideal for security purposes.
For example, in order to prevent brute force attacks, you can limit login attempts on your WordPress site. However, with XML-RPC enabled, that limit does not exist. There’s no capping on login attempts, which means it’s only a matter of time before a determined cybercriminal gains access.
By disabling the feature, you are closing a potential area of entry for hackers. Of course, without XML-RPC, remote access isn’t possible. You would need to log in directly to WordPress for publishing and updating purposes. Therefore, if mobile apps and remote software are the methods you rely on for site updates, turning this feature off may not be a practical option.
However, if security is your top priority, this may be a step you want to consider. Additionally, if remote connections aren’t something you deal with on a day-to-day basis, you likely won’t miss the feature when it’s gone. In this situation, you have nothing to lose and only an added layer of security to gain.
As we’ll discuss below, there are different methods you can use to disable xmlrpc.php. It’s important to keep in mind, however, that disabling this feature doesn’t have to be permanent. If you need to turn the feature back on, you can do so easily by simply reversing the process.
How to Disable xmlrpc.php With a Plugin
If you’ve made the decision to disable XML-RPC, one of the simplest methods you can use is to pick up a dedicated plugin. This solution only requires two very simple steps.
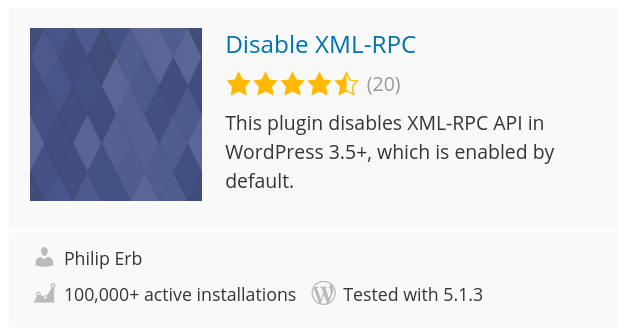
Step 1: Download the Disable XML-RPC Plugin
The first step is to download the Disable XML-RPC plugin. With over 100,000 active installations, it’s a highly-rated tool that you can use to block remote access to WordPress.
As with most plugins, you can find this one quickly by searching the WordPress Plugin Directory:
You can also download it in your WordPress dashboard by going to Plugins > Add New, and then searching for “Disable XML-RPC”.
Step 2: Install and Activate the Plugin
Once you locate the Disable XML-RPC plugin, you’ll want to install and activate it. After that, the plugin will automatically insert the code needed to disable XML-RPC. In order to enable the feature again, all you need to do is deactivate the plugin.
It’s important to note that there are some caveats to using this method. Some of your existing plugins may use parts of XML-RPC, so disabling it entirely could cause disruptions. Jetpack, for example, requires XML-RPC to communicate with the server. Therefore, it’s smart to test your site thoroughly after activating this plugin to make sure there are no compatibility issues.
Additional Plugin Options
If you do encounter problems with the above method, there are other plugins you can use to disable only certain elements of XML-RPC. For example, the Stop XML-RPC Attack plugin safeguards you from XML-RPC attacks, while still letting other plugins like Jetpack access the xmlrpc.php file. However, that plugin hasn’t been updated in a while, so you’ll want to test it carefully on a staging site first.
You might also consider Manage XML-RPC. This plugin makes it easy to turn XML-RPC on and off whenever you need to. It also comes with the ability to disable pingbacks and enable/disable the feature for certain IP addresses. Of course, you can enable XML-RPC for specific IP addresses using the manual method as well.
How to Disable xmlrpc.php Manually
What if you want to avoid using a plugin, and prefer instead to disable xmlrpc.php manually? This will prevent all xmlrpc.php requests from reaching WordPress and isn’t particularly difficult. You can do so by following these two steps.
Step 1: Insert Code into Your .htaccess File
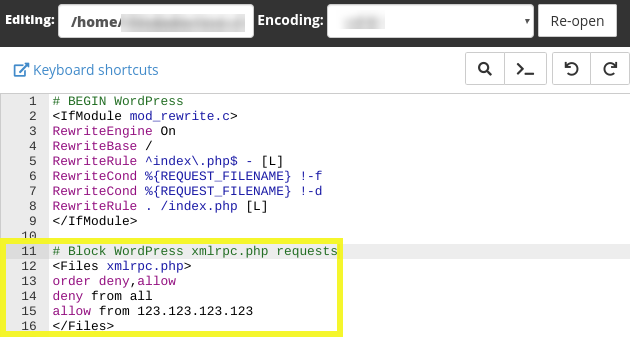
First, locate and open your .htaccess file in the root folder of your site. Once you have the file ready, insert the following code:
# Block WordPress xmlrpc.php requests

<Files xmlrpc.php>

order deny,allow

deny from all

allow from 123.123.123.123

</Files>
If there’s a specific IP address you want to allow xmlrpc.php access for, you can replace 123.123.123.123 in the snippet above. Otherwise, you can remove the fifth line entirely. When you’re done, save your changes:
Now, remote use of xmlrpc.php will be denied to everyone except the specific users you choose.
Step 2: Verify and Monitor the Changes
The above step is all that’s required to successfully disable xmlrpc.php on your WordPress site. However, it doesn’t hurt to verify that the feature has been properly configured.
To do this, you can use a tool such as the WordPress XML-RPC validator:
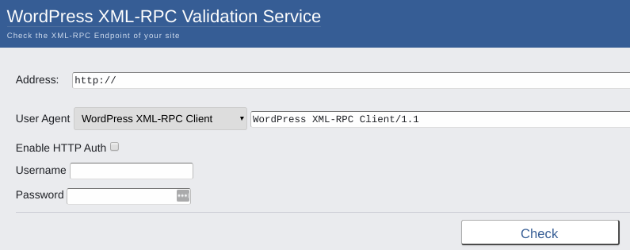
This validation tool is free and easy to use. Simply input your site’s address, and then click on Check. If you get an error message like this one, it means that XML-RPC is disabled:
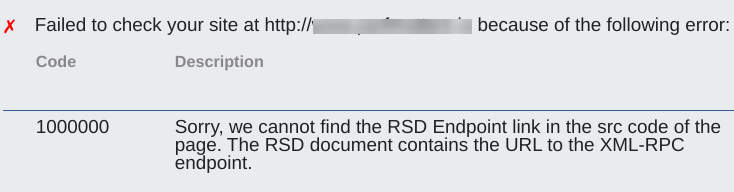
Periodically monitoring remote access to your site is also recommended. If you find that XML-RPC still seems to be working even after you’ve activated a plugin or manually inserted the code, it’s possible that another theme or plugin function on your site is interrupting the XML-RPC filter.
